Monday, December 4, 2017

Conventional Literacy

If you have read about my emergent literacy approach and you are wondering what to do with students who are more conventional readers and writers keep reading to see how I implement it in my classroom.


I have to be honest, I actually have both emergent and conventional readers in my groups so my conventional readers still do some emergent stuff (they love it), which is okay! All of my students have complex communication needs and are learning to use AAC and Core Vocabulary. With this I am able to differentiate and model a ton during my lessons.

Reading
During reading instruction I use Unique Learning System (ULS) and pull some of my favorite highly engaging read alouds from my shelf. In my classroom I choose to use the same story M-F but you could change your story multiple times per week if you had the time. As mentioned before, reading instruction is a great time to model core vocabulary and AAC. When working with my conventional readers I follow the Anchor, Read, Apply model.

Before Reading: This is our ANCHOR activity. This is where I get the kids thinking about the topic/or strategy we are working on. For example, if I want the students to be able to sequence the events in a story we will do a simple sequencing activity. I would pull activities (maybe 3-4) from their daily schedule and have them put them in order. During this time I am making sure to use the vocabulary I am wanting them to learn. In this case it would be "sequence". So I would say "I like the way you are sequencing the things you do during the day" "I see that you have breakfast first, reading second and recess third" etc. This is a quick activity so I spend about 10-15 minutes on this. (My emergent students are working on self selected reading during this time).

During Reading: This is the READ part of the model. I have all of my students and we get cozy in our group reading area. All of the students have access to high and low tech AAC. I begin reading the story. Making sure to introduce it and spend time talking about the author, illustrator and making comments about the title/cover. I will also try to have the kids infer if appropriate. I use the CORE board during reading instruction and model using the the C.A.R method.

Keeping the conventional literacy students in mind I will be sure to reference our anchor activity new vocabulary. So again if we were working on sequencing and we were reading a story about giving a dog a bath I would say "First we find the dirty dog", "Next we...." etc.

After Reading: This is when we APPLY what we have learned. I will generally use the same activity from the Anchor but change the content to match our story. So if we were going to sequence how to clean a dog I would be sure to print out pictures and have the students sequence them. 

Due to the nature of my classroom it usually takes me 3-4 days to complete all of these activities.

Writing
During writing instruction we are working on a lot of different skills. We do small group and individually writing. This is where my conventional students still do the predictable chart, cut up sentences......and making the book as my emergent students do. They just get additional writing throughout the week. 

Word Wall: I introduce new words to add to our word wall weekly. At this time we are working on adding 5 new words a week. When selecting these words I pick 3 core words and then 2 words with common rimes (in this picture I chose 2 core words and 1 color word...there can be exceptions :)). When selecting the rimes I use this chart. 
Instead of teaching the rime I add an onset and make that the word the students use (you will see how the rime comes into play later). So in the instance of the words below I chose the rime "ore" and "eat". I use the word more often (and it is a core word) so that is the word I chose to represent the rime "ore". For "eat" I just went with eat lol!
I print out the words and then paste them onto colored paper. The colors do not match the AAC coloring system. In fact I vary them as much as possible. The point of the colored background is so that students can see the contrast. They are easily able to see "tall" and "short" letters. I also make sure that if I have a word that starts with an I and the previous word on the word wall under I is green, I will not use a green background. 
The words are introduced and then we spend time putting them on the word wall. We talk about the first letter. Where it should go on the word wall. We talk about the background color and how we can see the tall, short and letters in the basement. We talk about how we know other words that sound the same (rimes). 

Word Sorts: We do this once a week. Students use our weekly "rimes" to make new words. We start with Visual sorts. I show students the 2 words from our word wall. We read them, talk about them and say them out loud. I then put them in 2 different columns. I then give students post it notes with new words that use our rimes. Students then sort the words into the 2 columns by looking at the words (visual sort). Here is an example:
After the visual sort we move onto auditory sorts. I take all of the post it notes and start the 2 columns again. This time instead of giving the student the post it notes I read them and ask the students where we should put them (auditory sort).

Last we do a spelling sort. This includes the auditory component but takes it one step further. I tell students to use the words we already know (not and same in this case) and make the new words they hear. I usually give each student their own dry erase board, or they just write on our table. If kids are stuck remind them to use the words they already know. Keep referencing those words and where they are on the word wall.


Compare and Contrast: This is a great activity because it makes students really think. They have to use our big tool, the word wall, and make new words. This is so much fun because it shows that kids that our little word wall is full of so many possibilities. 
I pick 4 words from the word wall and put them at the top of the board. I then write out sentences leaving one word out. The words that are missing can be filled in by using one of our given words as support. For example, in the first sentence I would say "I want to play the ....." "I wonder what could go there, I am going to read our words, think, same, not, make" "Hmm..I want to play the "Oh Game!". I am going to use the word same to help me spell the word game." This activity allows kids to see that they can spell words on their own. They don't need an adult to help them with every word. This activity allows students access to our word wall and shows them how to use this tool.

Spelling: For this activity I pick a few letters, usually only one vowel, and challenge students to make as many words as they can. 
I give them hints along the way. Looking at the above picture on the right I would say something like this. I am thinking of a word that only has 1 letter. It may start this sentence ___ like cookies. (They write it down. Can you add a letter after the letter I to make a new word? Can you change that letter again to make another? Again? Can you add a letter to the beginning to make the 2 letter word a 3 letter word? Can you change the first letter again? Try changing the last letter. Do you think you can make any more words?

Independent Writing: This is done everyday. I have the students start by picking a way they would like to write. These are the options I have in my classroom but you could add whatever you would like. These are velcro'd to the wall.

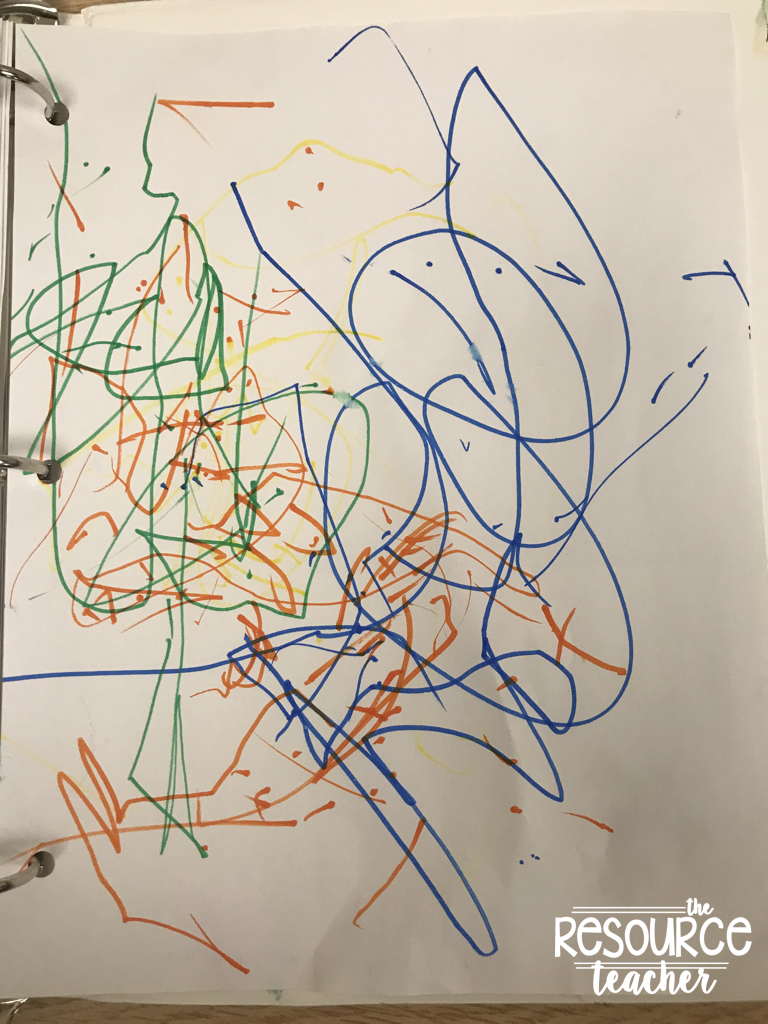
Once kids select how they are going to write they must select a topic. This is very difficult for my students so I try and give them some ideas (things they may have done over the weekend, what we are reading about, their family/friends etc.). When the topic is selected I let them go. It is very easy to jump in and help the students but this is all about independent writing. Have them produce the writing they want and then go back and help them if needed. Do not correct and fix every move they make. If you struggle with this (it's ok to admit this) go work with your emergent students at this time. Here are some examples of my students work. After they finish with their piece they hole punch it, add their name/date and put it in their binder. I add the most recent work on top.

Stamps:


Scribe: The student found these words on their communication device. Instead of the message erasing the para wrote them down on paper. She also made a note on the back to let me know how the student came up with these words.
Keyboard/Typing: If you can't tell this says "Purple jeep beep beep." This is 100% student work. Sure things are spelled incorrectly and there isn't punctuation but this is 100% this students work. It is 100% their own and shows exactly what this student is able to do. 
 Markers: While it may be hard for you to see this is a writing piece about a shark. I know this because the student brought a shark book to their writing station. They grabbed a blue marker and said swim. Grabbed the orange marker and said eat. etc. I added notes to the back of this to reference.

So, I hope you were able to add a few more activities to your mix. If you have any questions about Emergent or Conventional literacy I would love to chat. Feel free to leave a comment or email me.


post signature Follow my blog with Bloglovin

Wednesday, November 15, 2017

Phonics Activities

Being a special education teacher means you probably teach multiple grade levels, have students for multiple years and teach multiple academic levels. The last thing we want is for a student to be doing the same activities from K-3 grade because they are in our classroom all 4 years. So it is very important for us to a have a large bank of activities to pull from to keep students engaged. Today I am sharing with you some of the ways I teach phonics in my classroom. This isn't everything I do but these are some fun and simple ways to change it up!

GO FISHING
This is one of our favorite activities. I write words, letters, diagraphs etc. on note cards, attach a paper clip and use our magnetic "fishing pole" wands to retrieve words. I scatter the note cards around the room and then tell the kids to go and get them. This is where the differentiation can come into play. For some students I may say, go find 2 words that start with s. For another I might say, go find 4 words. Another group might be go and fish for a word that sounds like "not". The kids will then go and fish for them, bring them back to our meeting space and we will talk about the words they found. Depending on time and the number of words we have left around the classroom I send them out again. (You can find the wands on Amazon or at Lakeshore Learning).


SWAT 'EM
For this you will need a fly swatter and word cards. I use a giant fly swatter that I purchased at the Dollar Store a few years ago and then the same note cards that I used for the fishing game. I lay the cards around the room and invite students to "swat" the words. I will say things like.... swat a word that makes the "ch" sound. Swat a word that has the letter a. Swat a color word etc.


BEAN BAG TOSS
You will need something to toss, bean bag/ beanie baby, hacky sack etc and again....some word cards. I use the same words cards that I have for the other games and a beanie baby. I lay the words out and have the students stand behind the line (I use masking tape to create a line). Students then toss the beanie baby and aim for a word. Whatever it lands on they must read, tell me a letter, use it in a sentence...whatever level they are at I go with it.


LEGO LETTERS
Pull out your Legos and print these letters (for free!) I put the Legos in the middle of my room and tell the kids to fill their letter. For early finishers I give them a different letter or ask them to use their letter to write as many words as they can. If another student is done they can do the same or see if their letter is in any of the words that the other student wrote down.


Even though this isn't a huge list hopefully it added a few more ideas to your basket of tricks. What phonics activities do you do in your classroom?

post signature Follow my blog with Bloglovin

Monday, October 9, 2017

Student Mail Delivery Job

After years of trying to find meaningful jobs for my students that actually worked on their IEP goals and objectives I think I have found the answer. This however, is not my original idea. So thanks to the person who gave me this idea through a Facebook post, it has truly changed my life.....or at least my afternoon M-F :).


Here is what I did to get started.
1) I contacted my administration team for approval. I explained the job and the purpose behind it.

2) Contacted teachers who were on planning during the time we would be delivering the mail. We currently have 7/26 teachers who participate (more would me more than willing to allow this but, this is enough for us right now). I chose teachers who were on planning to prevent minimal class disruptions and allow time for my students to practice their communication skills. I sent out this email:
       
Hello 1:30 Planning Team :),

      We have a few students who are starting a mail delivery job. This job is going to help build  organization, transition and communication skills. We would love if you would be willing to participate. If you choose to participate we just ask that you leave your mail in your mailbox and interact with the students during delivery. A simple wave or high-five would be appropriate. Your mail will be delivered daily between 1:30-2:15. If you are interested please let me know.

Thanks,
Mrs. Boysal

Within minutes everyone I sent it to replied with a YES!, Sounds like fun!, Can't wait to meet the kids! Thank so much!

2) I found something to organize and deliver the mail. Thankfully our office has a mail cart so I just snag that when we need it. For the organization part I just use one of the cheap plastic file folder crates. I think I got mine at Wal-Mart or Target. I plopped some hanging file folders in it (7 to match the number of teachers we were delivering to) and put teacher names on labels. I just attached a large Avery label to the hanging folder tab (to make it bigger). (I grabbed this picture from Google...the color hanging folders would work even better!!!!)

3) I then decided which students would do the job. I currently have 3 students participate. Two of them (alternate days) stock/organize the mail cart and 1 of them does the deliveries.

4) Stocking/Organizing the cart: The student pushes the cart (with the file crate already inside) to the mail room and takes the mail out of the teachers box and puts it in the corresponding folder. I have an adult help with every step of this. At this time my students are working on "putting in" so the para currently gets it out of the box and tells them where to put it. But, this is a great way to incorporate matching skills if your students are working on those. Simply put a colored sticker (I'm thinking those garage sale dots) on the mailbox and a matching sticker to their hanging file folder in the crate. The student can take it out of the "green dot" mailbox and put it in the "green dot" folder. I know some districts require every task to match the curriculum so here are a few more ideas to help make this educational.
-you could have uppercase letters on the mailbox and lowercase on the folder
-states on the mailbox and their capitals on the folder
-vocabulary word on the mailbox and a definition on the folder
-math problem on the mailbox and the answer on the folder
There are so many "matching" activities that you could incorporate into this job.

5) Delivering Mail: The student I have deliver the mail needs "heavy work" incorporated into their day so I add a backpack to the bottom of the cart before he leaves. The backpack is filled with reams of papers to weigh it down. This student pushes the cart through the halls and stops at the appropriate class. During this time he is working on, walking in the hall appropriately, looking where he is going, knocking on the door, getting the mail, walking it to the teacher, saying Hi! and coming back out to the cart. Following directions is the BIG goal here!!

6) Clean Up: The cart is brought back to the classroom, the backpack and file crate are taken out and the cart is returned to the office.

I will admit having snack following the job is VERY motivating for my students. I do not use food as a reinforcer during the day/other tasks so making sure snack time was right after this not so preferred activity helps.....SHH!!! They will never know I am that sneaky :) (Grab this First/Then chart here)


I absolutely love this job and am so glad that endlessly scrolling through Facebook at 2am finally paid off!! This job allows my students to build real life job skills, work on IEP goals and objectives and get some sensory input as well.

Do you do a mail delivery job in your classroom? What has been your favorite classroom job that you have implemented?


post signature Follow my blog with Bloglovin

Saturday, September 16, 2017

Student Self Selected Reading

We all have it, those moments during the day where are classrooms are still. The students are attending to a task, the adults are quiet and for that one small moment, maybe 15 seconds, we can take a breath.

What would you do if you could block out 15-25 minutes everyday just for that? Time to take a step back and just breathe. Think about all of the things you could get done. Think about the skills you would be instilling in your students. Keep reading to see how I am able to achieve 15 minutes of peace in my classroom each day. **Disclaimer: I love my students and staff, the rest of the day is amazing. There is just something about this 15 minutes that calms me down.


A few years ago I attended a training about Emergent Literacy for students with significant needs (you can read more about that here). During part of the training the presenter spoke about self selected reading. At that time I thought to myself, actually I stated it to those around me, how the heck am I supposed to get my students reading independently? They struggle to attend to tasks with a lot of engagement and prompting let alone tasks that require them to engage themselves. But the more I looked into it and the more I practiced it with my students I realized it wasn't so much about them "reading" independently but more about them selecting their own reading materials and exploring them. When I made this switch I realized how valuable this skill is.  


So, how is it done? The first thing I would suggest is getting reading materials that all of your students are able to access. You can choose traditional books, big books, adapted books or online material (Raz-Kids and Tar Heel reader are our favs). If you are struggling to build your library due to cost (lets face it, books are expensive and kids handling them tend to make their lifespan much shorter) consider hitting up garage sales, your local library, family/friends or my favorite a retired/retiring teacher. Don't think you need to have a Pinterest worthy library to get started. As long as you have at least 3-5 books for each student you are golden. 

Once you have your books, set up an area that is dedicated to self-selecting reading. This allows your students to gain an understanding of what the space and materials are used for. You can have a large or small space depending on how your classroom is designed. I would suggest that the space is inviting and offers many seating options (my district is all about Next-Gen and flexible learning spaces/seating) so students are comfortable and feel like they have  a voice and choice of everything during this time. This is what my space looks like this year. I don't have traditional style seating in my classroom for whole group instruction so I have a lot of bean bags and easy to move chairs that we/the kids can use if necessary so please don't mind the mess :).


Here is what our book selection area looks like, I have it marked as the "Self Selected Reading" area so the students know (grab that here). I also make sure to have our Rules posted (grab those here), a chart that lets the students/adults know what level the kids can pick from (grab that here) and I have a visual that shows the different options the kids have during Self Selected Reading time (grab that here). 


As you can see the section on the right has leveled bins. I wasn't expecting some of my readers to be reading above an F so please excuse the miss matched labels 😬.  What I did differently this year was make sure to have both upper and lowercase letters on the label as some of my students can only identify uppercase at this time. I have also put the same label on the bottom right corner of the book. I also have a section on the left for adapted book bins. These are not leveled and I allow any of my students to read these as they are a great way for the kids to stay engaged. 

This year I am really diving into the ULS (Unique Learning System) curriculum for reading. I wanted a way to display the supplemental reading materials to go along with each unit so I got this book display. I have taught students/adults that these books all have a red dot on the corner (red to match the display stand) and to look for the level. If the level is above their reading level I still encourage them to select a book from here (as it goes along with our unit) but they will need to ask an adult for help.


So now that you have a space and materials it's time to get the kids reading. Plan out a block in your day for self selected reading. I currently have 15 minutes and put it at the end of my reading block. Be intentional about this time and teach/model exactly what you want the students to do. You can even consider reading each day with them. Grab your favorite book, pull up a comfy cozy and indulge. I personally use this time to get materials ready for the next lesson, conference with students and pull students for a quick lesson (still allowing time for them to do some self-selected reading).

**This is a Google Image. I do not take credit or own this photo.
This will consider some mind shifting. You will have to be okay with kids self-selecting and attending/exploring vs. independent reading. You will have to be okay with kids waving the adapted book you just spent time laminating and assembling. As time goes on the kids will learn. I have students with significant cognitive, behavioral and physical needs and we do this. You can do this!!! One of my students took part in this everyday last year. It wasn't clicking and he needed a lot of support but this year, he is able to look, open and even point and vocalize while looking at the book independently 😁.

My biggest piece of advice is to let you know it takes time. This is not going to look pretty the first day, month maybe even a year. But, think about how valuable this is. If your students develop this skill they will be able to visit and be socially accepted in a library, coffee shop etc. There parents/care givers could throw in a load of laundry or use the bathroom without having to worry about what their child is doing.

So take a step back, implement self selected reading and take a moment to breathe!!!!


post signature Follow my blog with Bloglovin

Sunday, September 10, 2017

PBL in SPED

Project Based Learning or PBL is the new craze. It is all about student led and future focused. When I first heard about PBL I was a little skeptical. I thought it was awesome and a great way for general education students to work on communication, collaboration, creativity and critical thinking but I was still stumped on how our students with significant needs were going to be able to do this. If you are still a little confused on what PBL is all about here is a great graphic to show the difference between projects and PBL's.

My school is a PBL school and all of us are required to either teach or help with a PBL project each year. Last year I teamed up with our speech paths and we had the kids plan a party to thank all of their friends for helping them throughout the year. While it was a great project and the kids had fun I really wanted to do something more this year. Keep reading to see the project I have planned for this school year.

When thinking about planning a PBL project in my severe needs special education class I knew things where going to have to be a little different. Instead of allowing the students free reign I was going to have a provide a lot of scaffolding and allow for the "student led" and "voice and choice" to come through during teacher driven activities. Even though this isn't traditional PBL....our classrooms are not traditional and as long as we are trying that's all that matters.

So, what do I have planned for this year? We all know questioning is a huge part of our special education classrooms. Almost all of my students have some sort of "wh" question goal. So, why not teach these through a fun and engaging PBL?

Drumroll please..... our PBL project is called "Dream Vacation". I am going to have the kids plan their dream vacation. Throughout this project students will learn all about the "wh" question words.  I am planning on only doing this project on Friday's so it will more than likely take us to winter break. I made this bulletin board and plan on hanging our anchor charts up once we have learned about a specific "wh" question word.


Our launch item will be this Arthur episode. The hope is that it will get kids to start thinking about vacations.
 

After this I plan to have the kids branch off and watch some videos on different vacation spots. I have some bookmarked showing skiing, swimming, hiking, amusement parks etc. The paras will have a sheet to help the students mark down their favorites. I am then going to have them take it home and have them work with their parents to narrow down what they would like to do.

Then each week we will focus on a different "wh" word. They will have to explain "who" is going on the vacation, "where" they are going, "when" they will go, "what" they will do, "how" they will get there and "why" they think it's a good trip.

Through learning about the "wh" question words we will start to build their "Dream Vacations". The goal is at the end of the PBL students will be able to showcase their dream vacation. A huge part of PBL's is the public product. I am thinking the kids can create a video, brochure or set up a little area that resembles their vacation. I would love to invite their families, our administration and community members in to see what they came up with. Make sure to check back throughout the year to see how this PBL is shaping up.

While attending a PBL conference this summer one major thing stuck with me; PBL's are messy. Don't be afraid to dive in and let the student's take the lead. So, no matter how much my type A personality wants everything to line up perfectly I have to let it go. In the end everyone will learn more and grow.

Do you do PBL in your classroom? What projects have you done?


If you are interested in learning more about PBL make sure to check out http://www.bie.org/ The Buck Institute for Education does all things PBL and has a ton of information and pre-made projects listed.
post signature Follow my blog with Bloglovin

Monday, August 14, 2017

Student Schedules

Schedules! Hearing the word just makes me anxious. So many things go into making the perfect schedule. I know everyone's classrooms run differently but I can tell you that I do not have a self contained room. All of my students are assigned to a general education classroom and then come to me for reading, writing and math.....some do end up staying with me all day with the exception of specials and recess. So... that means I have to build my schedule around 4-5 general education teachers schedules. It can be a nightmare. However, once I figure it out I really do enjoy creating the physical schedules for my students. Keep reading to see the different types of schedules I have in my classroom.


When making schedules keep your students in mind. While there may be some super cute schedules at Target or on TPT but ask yourself, "Is this really appropriate for my students?" Not all students have to have the same type of schedule. For instance, this year in my classroom I am going to have 8 students (the lowest I have ever had!) and 4 different types of schedules.

The first schedule is for my highest functioning students. They struggle with reading but are able to follow routines. I made an outline of their day on a single page. There is a picture to help with reading the schedule and a place for them to check off with a pencil when they have finished the task. They are also working on telling time so I made sure to add that to their schedule as well. I will print these in black and white, hole punch them and add a stack in their binder (that they will carry with them to and from classes). On the back side I have left a space for notes home and notes to school. This will serve as the daily communication component for these students. If you didn't need the daily communication part you could print the schedule in color, laminate or slip in a page protector and have the students check off with a dry erase marker.
 
The second schedule I have is for my middle group. This schedule will include a little more prep but is the best for this group of students. This group is able to read and/or understand what the next subject is but needs a little more visual supports when knowing that the task is over and what is coming up next. I have made enough pages to include all of their schedule icons for the day. Some students have more pages than others depending on how much they are doing throughout the day. For this I printed in color, laminated and then added velcro. The student will check their schedule (located in a binder) and complete the task. Once finished the student will pull off the icon and put it on the back of the page (I added velcro there too) or put it in a finished bin/pouch. They will then look at their schedule and move onto the next item. For this schedule book I decided to only have a few schedule components on each page so that it isn't too overwhelming for this group of students. 
 

The third and fourth schedule I have made are similar in concept but stored in different ways, it is for my most complex learners. I made a color coded schedule (below you can see the color template) that will be housed in a binder or on the way (depending on student need/level). Each student has their own color and will check their schedule, pull off the task, locate the matching large schedule piece in the classroom and attach the little schedule piece to the big piece. This allows the students to not only know what is coming next but is concrete enough for them to understand that where they put the piece is the location in which they will be completing the task. Since I have a few students using this model and have a color coded system I decided to have the main schedule piece in white and then have the student corresponding colors on the bottom. That way they each have their own dedicated space at the center.
 

**Hint: make a schedule guide so you, your paras or even your students can reset the schedule at the end of the day if needed.
There are many other types of schedules you could set up. For example you could have a google calendar with alarms, write it out on post-its, have an entire page filled with a weeks worth of tasks for the students to check off when completed. You could also use actual objects for a schedule, first then schedule (very basic and limited visual stimulation). These are just a few examples. Do you have any different types of schedules you use in your classroom?

post signature Follow my blog with Bloglovin