Saturday, April 15, 2017

Classroom Food Cart

Have you heard of classrooms having food carts or coffee businesses but don't know how to get one started? Here is how we run the food cart at our school.

We start off every school year with free samples...this is how we get everyone hooked. We set up a station in the front office and send out an email letting everyone know. We also put out a food donation sign up sheet in case anyone wants to donate store bought or homemade goodies.
This is what our food cart looks like today but this is not where we started :). When we first started we had our local grocery store donate coffee, teachers donated snacks and we had a tiny cart. After a few years, grants and donations I can say we have a pretty awesome little business.
The purpose of the food cart is for our students to develop and practice skills in the following areas: social norms, communication, money and team building.

We take the cart out every Wednesday and Friday. I work in a pretty large school (800 students) so we have 6 special education teachers in my building. Out of that, 4 of us manage the food cart. We have a group of students who price and stock it, we have a group that works with a teacher on ordering, I make the coffee (which is funny because I am the only one who doesn't drink it) and another teacher handles all of the money.

We are so fortunate to have had this awesome coffee maker and carafes donated. It's super easy. I my amazing paras plug it in and wait for it to heat up. Once it's ready we pop the coffee in, put the carafe under and pour in the pitcher of water. In about 3 minutes we have perfectly brewed coffee.
I store all of the coffee next to the maker on my counter. They are usually large bags so I make sure to secure them with binder clips so the coffee doesn't taste stale.....had that complaint once 😁. We also got a HUGE thing of coffee filters 2 years ago and we haven't purchased any since. I honestly think we will be set for 3-4 more years lol.

I change out the labels for the carafes when needed. We don't do anything fancy here, just computer paper, marker and masking tape. I am sure you could get a little more creative here if you wanted to :)
We also have all of these yummy snacks and drinks on the cart. We price everything for $1.00 (coffee is $0.75) to make the change making process easier. If you have students with higher level math skills play around with the prices to make it more challenging for your kids.

This cash register is a new addition this year. It has been great to store money in it (we used to put it in a coffee cup) and use the calculator portion.
Now that the coffee is made and the cart is stocked we are ready to take it out. I have a few students who need walkers to get around. The cart is PERFECT for them to push :) The students take the cart from classroom to classroom. This is where the magic happens!!! 
All of my students who take the cart out are non-verbal. They have gained so many skills through this process. They knock on the door and use the pre-made communication device. Check it out here. 
            
We used GoTalk Lite to create these. That is why we have a British accent for our boys...if you pay for it there are many voice options. 

The teachers then come out and tell the kids what they would like. Depending on what the kids are working on they will take over the order (getting coffee, making change, finding the items, talking with the staff member etc.).

The coffee cart has been AWESOME!!! for the students and staff at my school. Here are a few testimonials from staff members at my school. 

"I love having the food cart come by, not because of the food ( though it's  good) the best part is seeing students learn how to work with money and help others. The staff that works with these students are so patient."

"I love the food cart for various reasons. Not only do we get a nice little surprise visit for a delicious snack, but it's so nice to see our students leading within this initiative. Whether asking if we are interested or handling money and selling items, students are in charge of the sales and exhibit leadership qualities and handle the responsibilities wonderfully. My students also enjoy having them stop by. It gives us a brief moment to stop, visit, extend our hellos, and share in a brief, yet kind moment of interaction that we normally don't get to share within the hectic school day. It's a moment where students get to see how we can support one another and help each other's causes just by purchasing a small item. I love it."

"I love the food cart because I like seeing my former students and interacting with them. It's fun to see their social progress."

"I love the interactions and real-life application these students receive when working/learning with the food cart."

"It is a very positive learning tool for everyone!"

We use the money that we earn from the coffee cart to purchase more items. It is all self funded. If we have money at the end of the year we put enough aside to place the first order for the next year and then all of the left over money we use to put into other projects at our school (kids needing coats, Christmas gifts, toiletries for students etc.). 

I have found that running the cart the way we do is super simple. There isn't much that goes into it (once you have it up and running). At the end of the year we also have a MONSTER SALE to get ride of everything. The teachers LOVE this.
post signature Follow my blog with Bloglovin

Sunday, March 12, 2017

Hands on Math Activities

Do you have students who struggle to complete paper/pencil tasks? Do you have kids who need hands on materials? Check out some of the tasks I have set up for our March math centers.


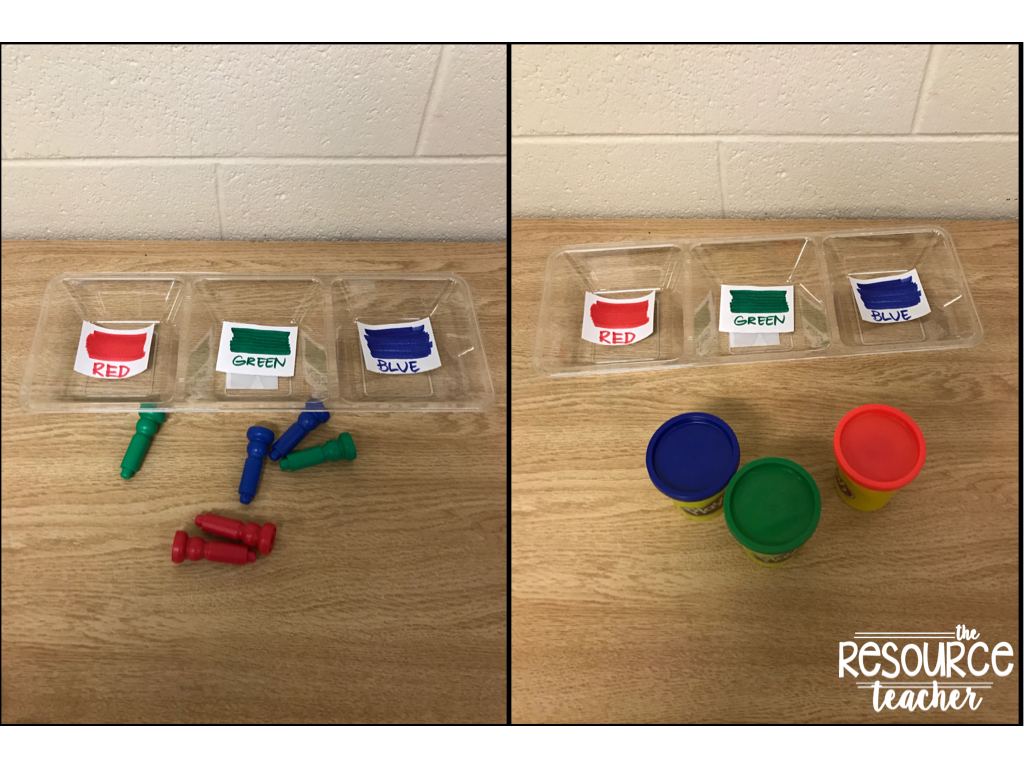
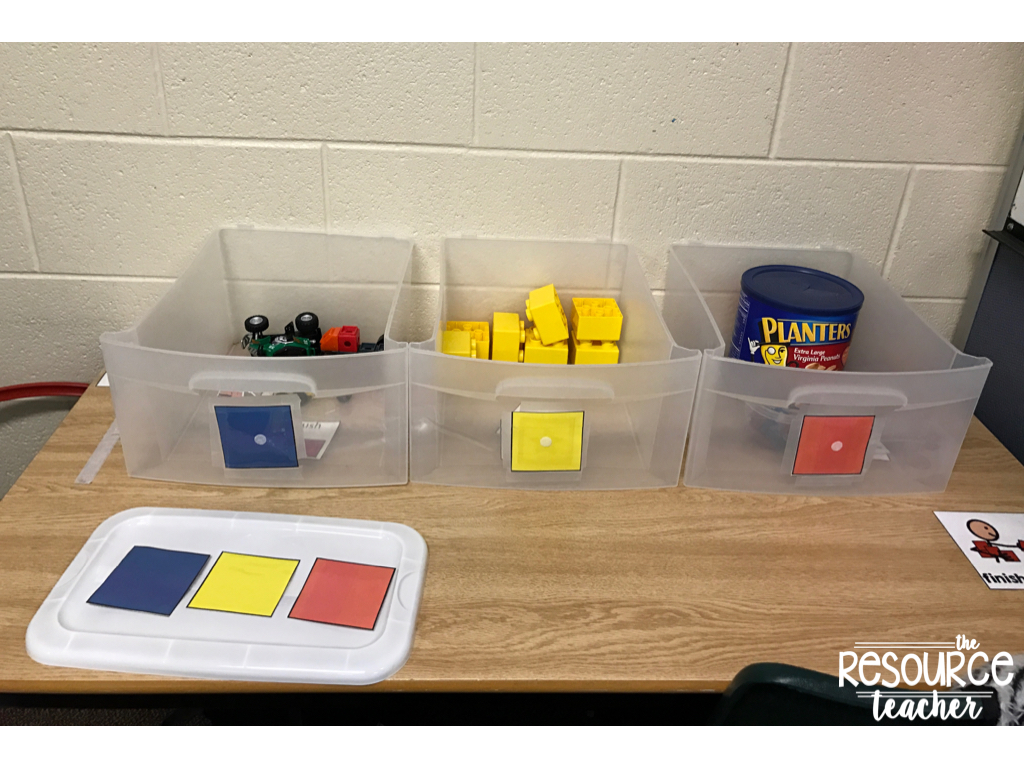
Color Matching Tasks
Here I use the same sorting bin but switch out the items to sort. This makes it somewhat of a routine task for my students but enough change to generalize the task.
 These are super fun, especially for March! I love themes so this is a perfect way to carry our literacy theme of the week/month over into other subjects.


This is a color matching task set up in a T.E.A.C.C.H bin style. The students can still work on color matching but have the opportunity to work on a variety of tasks throughout.

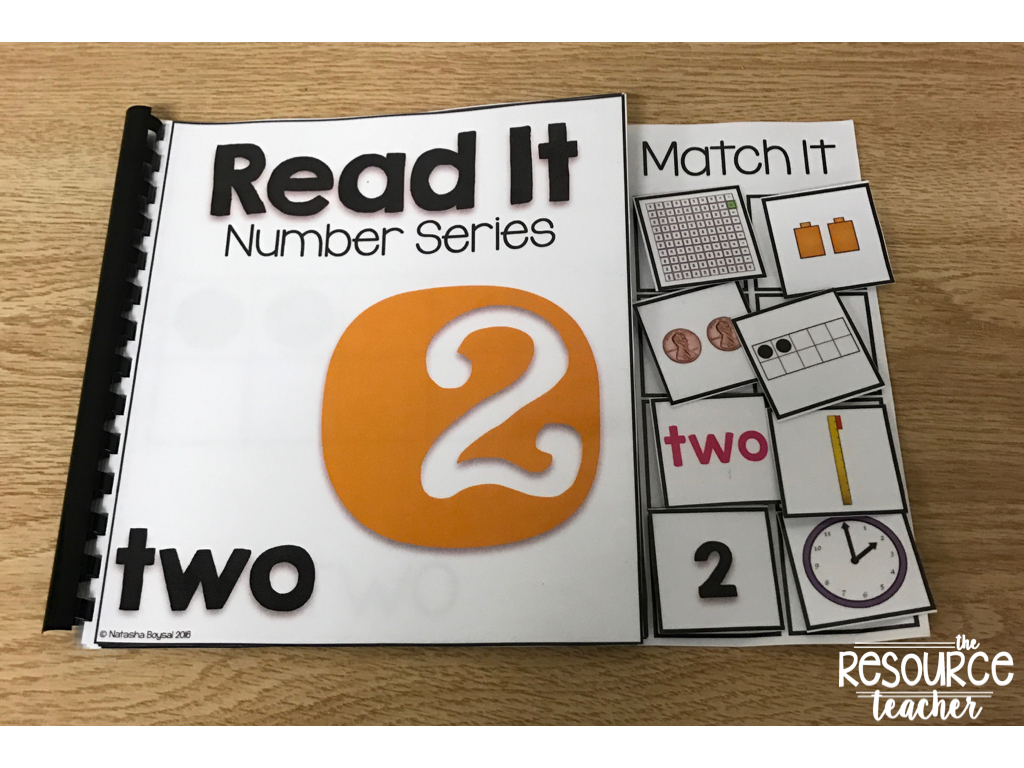
Incorporating Core Vocabulary in Math


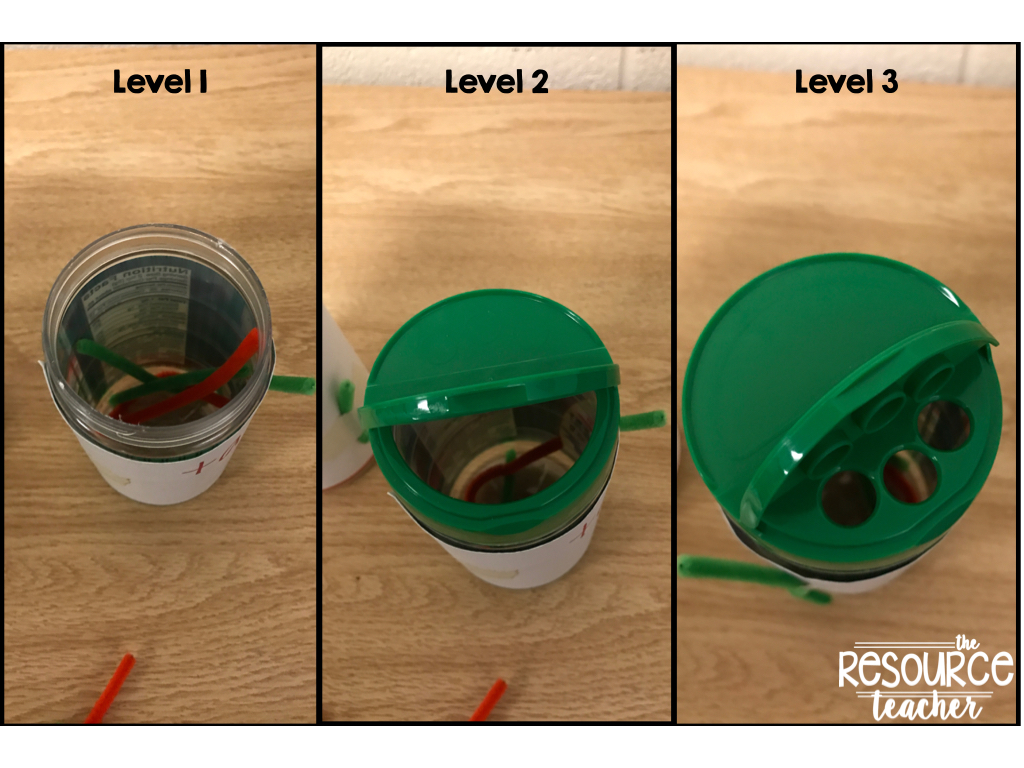
Fine Motor

These are parmesan cheese containers. You could make them way cuter but I change them regularly and haven't eaten enough parmesan cheese to have an abundance of containers :). So I just wrapped them with computer paper and wrote what I wanted in each container.

You can differentiate these tasks by offering varying levels of fine motor.
While this may typically not be considered a fine motor task, adapted books offer tons of fine motor practice. The students have to turn the pages, hold the book with one hand and detach and attach the icons with the other hand. All of which can be done while learning new math concepts. You can check out these Read It: Number Series books here.

Number Tasks

Students can practice counting while learning where the Touch Dots go. These are perfect for all of my students (even my pencil/paper math students). You can check out these Monthly Themed Touch Dot Mats here.
 Students can do direct number matching on the tens frame. They can also add monthly themed items like hearts, gold coins or mini apples.


I love using these puzzles. I store them in baggies by number sets to make it easy to grab. I have students who are working on numbers 1-2 while I have others who may be working on numbers 18-20. Organizing it like this allows for quick center changes and differentiation.

You can work on a variety of skills here. Students can sequence the numerals, count the objects and read the number words. You can have this be a completely independent task or provide support for certain parts.

These cards are great for introducing addition. My students love to match the dots and then use the calculator to check their work.


Need Kids to Move Task?

Here is one activity I have set up in my room. The students have the main mat on the desk but the answer cards are on a board across the room. This not only offers the students movement while working but it also works on their recall skills. They are forced to look at the mat, walk across the room and then remember what they were looking for.


I would love to know what kinds of hands on math tasks you have in your classroom!

post signature Follow my blog with Bloglovin

Sunday, February 19, 2017

Alternative Pencil

Writing can often be over looked in classrooms of students with significant disabilities. It's no fault to you or your staff, there are just so many things to focus on; behaviors, speech, following directions, toileting, eating etc. If you had to give up something, I am sure writing would be the #1 thing as it may not seem like a very functional thing for our students, especially those who struggle to hold standard pencils. That is... until you introduce an alternative pencil.


I started using alternative pencils when I went to a conference last year on emergent literacy, read more about that here. It honestly changed the way I taught. Usually you go to conferences, they get you super excited about the new teaching method, you come back, implement it into your classroom and a month later you give up on it or find something else. Well folks, I have to say, I have never gone back to the way I didn't teach 😁  taught writing!

Alternative pencils allow our non-verbal students a way to express themselves through text. It is engaging for both the students and teacher. I love seeing my students sort through the letters to spell out their message.

Here is what my alternative pencils look like.


How do they work? You can project the pencil or just print and hold it.
1) Make sure you have something to write responses on (whiteboard, typing, paper)
2) Then determine how your student is going to respond (yes/no). Are they going to shake their head,     use a switch etc
3) Start by asking your student "do you have something to say/are you ready to write etc."
4) Put your finger on A, say "is it ABCDE" and point to each letter.
5) Student responds
6) If they say yes then go through each letter slowly until they tell you their letter. If they say no go to     the next column and repeat. If they say yes acknowledge it and record their answer.
7) Repeat but this time say "do you have another letter"....then go through the process again.

Here is a video to better explain this process. I did not make or own this video.

Now you might be saying "this is great, but my students don't know how to write. They don't know their letters, they can't spell". While this may be true, do we truly know how much they do and don't know if they haven't ever had a way to express themselves? It's something to think about right?

A huge part of this process, especially for students who are new to this, is interpreting what they are trying to say. Here is an example of something a student wrote in my class.


When seeing the letter QFT what comes to mind? quick, quarter, quiet, fight, Friday, fries, go, goal etc. Think about your students interests or common things they like to watch, say etc. When I was doing this with my student I said to him...did you mean quick field goal (they played soccer in P.E.), he didn't have much of a response. Then I got really excited and said did you mean......Cute Girls??? He instantly lit up, started smiling, clapping and shaking his head yes!!! Clearly this is what he was thinking about (maybe not but he was excited about it!!). So this is what I did. Write down what they were actually trying to say then use the alternative pencil to model how you would have spelled the word(s).

I will be the first one to admit, this is hard. The kids will struggle. It's all new. But think about when you give any child a pencil for the first time, what's the first thing they do? Scribble....So take the plunge, download this alternative pencil and get your kids scribbling!!!!

Thursday, January 5, 2017

Digital Student Portfolios Using SeeSaw

If you are anything like me you're always searching for new and easy ways to keep track of student work to have on file for conferences/IEP meetings etc. For years I struggled with binders, file folders, digit files on my desktop and so much more. I was so tired of it and knew I had to find something that would make my life easier. Tah-dah!!!!!!


SeeSaw is a FREE (you can pay for certain subscriptions but the free one is perfect!) app that allows you and your students to build digital portfolios. It is super user friendly, the kids love it and best of all.....it makes collecting student work samples SOOOOO easy.
Once you get signed up, add your students, download the app and connect it to your account (simply snap a picture of the class QR Code) you are ready to start.


The students are able to add photos, videos, drawings, notes or links right away. We use photo and note the most in my classroom.

Here are a few examples of student work from my classroom.

1) Rainbow writing. I snapped a picture of our worksheet and the kids select different colors right inside the app. It is also easy to differentiate. Notice how one of my students has one large word instead of all 5.


2) Using the Note option, I had my students type sentences using their spelling words and respond to a question following a story I read.

3) Using the drawing feature I had a student draw a picture after listening to a story I read aloud.
4) I took a picture of a vocabulary card and had my student write about it using the caption feature. For the second picture we took a picture of the work a student did on the Smartboard.

5) We are working on counting by fives so I used the video feature to record my student counting by fives. We took a picture of the chart and she touched the numbers while counting out loud (this is just a screenshot so the video portion will not work)

What I love about this app is once kids "turn" in their work you are able to approve it, make comments, like it. It is very similar to a Facebook news feed. As you can see here I have 13 items to approve.

Once you approve the items they are sorted and stored in each students individual folders. It makes searching for their work quick and easy.

There is also a parent feature where you can give parents access to their child's portfolio. I haven't explored this option yet. I am thinking about just sticking with the classroom option for now :).

I cannot tell you how fast my students picked this up and how nice it has been to be able to have instant data collection/digital portfolios. Make sure to sign up for a free account at http://web.seesaw.me/

Have you used SeeSaw before? Do you have another digital portfolio app that you use?

post signature Follow my blog with Bloglovin

Tuesday, November 15, 2016

Velcro Piece Organization

I know I am not the only one who has spent hours prepping materials. Printing, laminating, cutting and velcroing. You set everything up in your classroom so it is picture ready and then......they come!

The kids who are excited about learning and using all of the cool materials you have made. One thing I have learned about kids during all of my years of working with them is no matter how much you "train" them, there is still that possibility that not all of your little velcro pieces get put back exactly where you intended them to be. Keep reading to see how I organize all of my velcro pieces. This post will show you how I organize my awesome monthly themed binders from Melissa over at Autism Adventures!!


Step One: Prep all of your mateirals as you normally would.

Step Two: I label all of my title pages with numbers 1-12. I label mine in the bottom right corner. Here is binder #5.


Step 3: Label all of the pages of that binder using a decimal system. For example since all of the pages belong in binder number 5, they will all be labeled with 5.__. Here is an example of how I labeled page 6.


Step 4: Label all of the velcro pieces associated with that page with the same exact number.


Step 5: Do this with every binder.

Now I am not going to lie, this does add a few extra minutes onto your prep but......when this happens


You don't have to guess where the pieces go. You know exactly what binder and page they belong to.


What organizations systems do you use for your binder/velcro tasks?


post signature Follow my blog with Bloglovin