Monday, August 15, 2016

SPED Tips for First Year Teachers

I have been getting a lot of questions about tips for first year teachers so I figured I would write a blog post about it.


Now that you have nailed down the job, gotten the keys to your classroom and shared the news with your family and friends it's time to get started. Here are a few tips to get you started in your first special education class (these are in no particular order).
Make sure to get your hands on student files ASAP. These files will help you get a better picture of your students. They should drive how you setup your classroom, organize your aides and let you know the types (if any) of visual supports they need.The files should also give you a little glimpse of their family life. This isn't always written into the IEP but check out the parent input section.
Take the time before school starts to meet the staff. Get around to as many people as you can. Take the extra time to introduce yourself to the secretaries, specials teachers and general education teachers who will have daily interactions with your students. 
It is also imperative to setup a meeting with the para professionals that will be working in your classroom. Have a plan before going into this meeting. Make sure to share with them a little about yourself. It may also be a good idea to write down a list with them of things that worked well in years past and things that could use improvement. Use that list to help you slowly implement the things you want. To make a smooth transition it is always good to remember to make changes slowly. I usually make a detailed IEP at a Glance for my aides. It will also be a good idea to share how you plan to run your classroom and the expectations you have (possibly no cell phones, side conversations etc.). I like to write these down and post them in my classroom so they are available for everyone to see (even subs that may come into the classroom).

As a first year teacher this is probably the thing you are most excited about. You may have picked out a theme, bought bulletin board supplies and picked out cute matching bins. While all of these are great and may make you feel a little more at home they are not necessary. If you are not able to make these purchases no sweat. I will let you in on a little secret, I have never had a theme, matching bins or set up a bulletin board in my classroom. However, if you want to do those things please do....I just don't have time for that.


When I setup my classroom I keep 2 things in mind, my students and function. I think about what needs my students have (do they need a sensory space, are they eating lunch in my classroom, do I need room for wheelchairs/walkers etc.). Everything I put in my room serves a function. For example, I do not put a teacher desk in my room because it doesn't really serve a function for me other than a place for papers to pile up. Instead I use my direct teaching table as my desk.

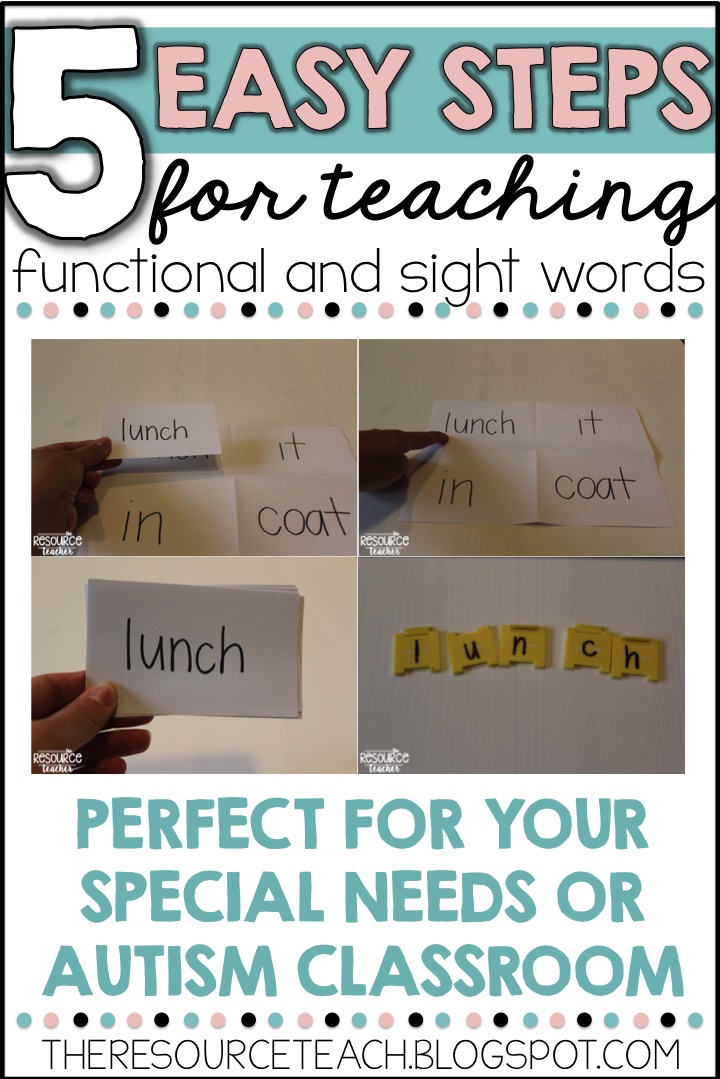
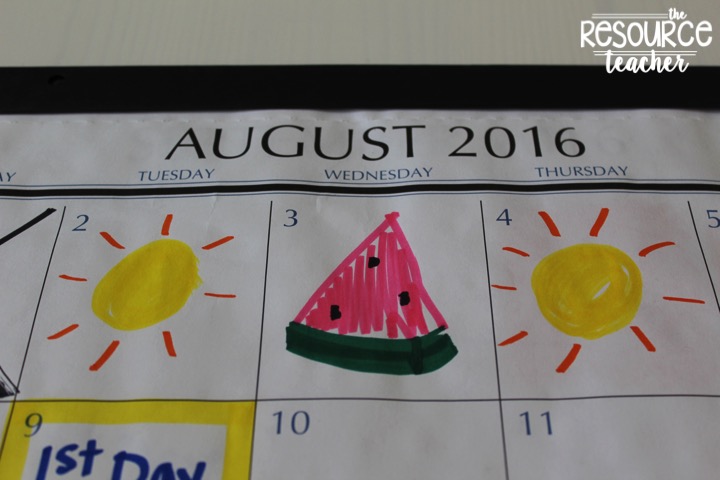
This is always my favorite thing. Instead of decorating my classroom with cute posters and matching bulletin boards I put functional visuals around my classroom. I create student schedules, classroom schedules, token boards etc. Here are a few of the visuals I have in my classroom.
     
Figure out the way that you are going to communicate with parents. Are you going to send emails, texts or give them a phone call? Are your students able to report to them what happened during the day or do you need to send home a daily note? Whatever you decide to do remember to give both positive and negative (if any) information. Also be honest and work with parents. Educating children with special needs takes a lot more than the time spent inside the classroom. My students send fill out this form daily. Grab it for free here.
Once your students have arrived and you have taught basic routines and gotten the classroom under control it is important to take baseline data. Assessing students before instruction will help you figure out exactly what area(s) they need direct instruction in. It will also let you know if some of your students can be grouped together. Here are a few things I use for baseline data.


The best advice I can give you is to take a breath. Even if you have everything planned out things won't always go as planned and guess what.....it's OKAY!!!! The important thing to remember is what are you going to do different the next time? 


Also make sure to find time for yourself. Don't spend all of your extra time focusing on your classroom and students. You need to find balance. Somethings I like to do in my off time are take walks, go to the movies, watch Netflix and spend time with my family and friends.

Congrats on your new job and good luck with the school year!!!!

post signatureFollow my blog with Bloglovin


Friday, August 12, 2016

Teaching Functional/Sight Words


The reading process is very challenging. You have to rely on your vision, hearing, memory and judgement skills to gain a true understanding of the process. Students with disabilities struggle with this and don't really get the chance to read and write for meaning on a daily basis. Because of this, it is our job as educators to make sure our students have access to the words that are the most meaningful to them. Teaching functional words to students with disabilities should be at the top of our list. Increasing a students vocabulary, increases their communication and in return should decrease those negative and unwanted behaviors. So here are 5 easy steps to teaching functional and sight words to your students.
Before you begin teaching it is essential to get a baseline on your students. Gathering data before you start teaching will do 2 things. First it will let you know exactly what area(s) your student needs direct teaching in and second it gives you a baseline so you can compare after you have done direct teaching activities. When assessing make sure to use your judgement on the amount of words you want to assess. It is okay to start small using only 2-4 words. You know your students best!
Now that you have assessed your students you can see the area(s) in which they need further teaching. Use those words to do the following direct teaching lessons.
To begin your teaching of functional and/or sight words you will have your students match the words. For this activity you will determine the field in which you want your students working in. I typically use 4 but I have also used as little as 2 and as much as 8. Lay out your main page. This will be a grid that distinctively separates the words.


Next copy those same words onto flash cards (notecards or scrap paper). You will then say the first word and hand it to your student and say MATCH (word). It is imperative that you use limited verbal instruction so you don't distract your students on what they are supposed to be focusing on (the word).

Your student will then match the word onto the main page you have laid in front of them. If they get it right give them a quick positive reinforcement (a high five, a "Great job", nice etc.) If they get it wrong give them a visual redirection (point to the correct word). You will do this until you have gone through all of the words. Repeat this 3 times during each teaching.


Once your students are able to successfully match the words 3 times they have mastered it and can move onto the next direct teaching lesson.
The next step in teaching functional/sight words is teaching your students to select words from a group. For this activity you will lay out the words in an array on the table directly in front of your student. You can create entirely new cards or simply reuse the materials from the matching activity.


Again making sure to use limited vocabulary, simply tell your student to give/point to the word (of your choice). Do this until the student has successfully made it through all of the words. Repeat this process 3 times.


Just like in the first activity, once your student has successfully selected the words 3 times, they are ready to move onto the next activity. 
Now that the student has been able to master matching and selecting words you have asked them to, it's time for them to start reading words of their choice. Hand them all of their flashcards (the words they have been practicing). Ask them to read the words 1 at a time. Giving them the entire stack allows them to choose the order in which they want to read the words. Again remember to give positive reinforcement and redirection when needed. 


Have the students successfully read the words 1-2 times before moving on. Once you feel they have mastered the words it is time to assess them again.

Use the same assessment you used at the beginning. Compare the data and see the growth!!! If the students have successfully mastered the words they are ready for the next step. For words they didn't mastered start the process over again. If you were working on 4 words and they mastered 3. Repeat the process with the 1 they didn't along with 3 new words!
After your students have mastered words it is important to continue to practice them. Here are a list of possible reinforcement activities you can do with your students. I use these activities all year long and continue to add words. By the end of the year they will have all of their words (unless the amount is overwhelming). 

Jenga

                        
**I pulled these pictures from Google.....I do not own them**
Write the mastered words on the Jenga pieces. As your student play Jenga they can read the words. If your students struggle with playing Jenga they can have a basket with all of the pieces, pull out a piece, read the word and build something with the peices.

Twister
**I pulled these pictures from Google.....I do not own them**
Tape word cards to the different circles. Play the game as you normally would but when the student touches a new circle they will read the words. To make it more challenging students can read all of the words their hands and feet are touching every turn.

Lily Pads
**I pulled these pictures from Google.....I do not own them**
Write the words on lily pads (or any fun design) and have your students hop from one lily pad to the next. As they hop they have to say the new word. I really like this activity because it helps my kids get their wiggles out.

Make and Break


Have students use letter tiles (these can be magnet letters, Unifix cubes or anything you write letters on) to spell the word they are shown. As the teacher you will write one of their mastered words on a white board. The student will then use their tiles to correctly spell and read the word. You can level this activity. If they are just starting out consider only having the letters that correctly spell the word. To make it more challenging have the students choose letters from a larger field.

I hope you enjoyed learned a quick, easy and structured way to teach those functional and/or sight words. 


post signature

Monday, August 8, 2016

Functional Calendar Routine

Calendar skills are something that are super important. Students (of all ages) need to be able to look at and understand a calendar. There are also so many skills you can tie into a daily calendar routine. In the past I always printed cute theme calendar pieces that I laminated, Velcroed and stored in a cute little container by the board. Don't get me wrong, there is absolutely nothing wrong with doing this. However, I don't have time for that. It was so much prep work. And then.....something comes up and you don't have a piece you need AHHHH!!!! My friends, no worries. I have the answer, introduce this Functional Calendar Routine into your day.


This idea was one that came to me at 3:00 in the morning and I had to roll over and add it into my Amazon account before falling back asleep. In most of our special education classes we are teaching functional/life skills. So....why not get the kids using a REAL calendar? Since this idea just came to me and I haven't started school (heck I haven't even been allowed in my classroom) I don't have it set up and these pictures have totally made up activities on them but I wanted you to be able to see what the heck I am talking about.


Here it is......a standard (well school year) desk calendar. You can purchase any calendar but I liked this one because it has holes in the binding. That way I can hang it on Command hooks. I also liked that it has large day boxes and a section for notes.


Using this desk calendar allows me to do WHATEVER I want. If I want to work on patterns I can, if I want to add special days I can, if I want to show my students when school and non-school days are I can. Best of all, after I think I have the month complete and I get the news that "Mrs. Smith's" class is going on a field trip to the Dairy Queen I don't have to run to the computer, print off a picture, laminate it, velcro it and get it on the calendar. All I have to do is WRITE IT!!!! Actually I am going to have my kids write it. I am going to get them used to handling a real calendar just like I do everyday.

Here are a few things you could do:

Patterns- Since you are able to do whatever you want and you don't have to worry about prep work do whatever your kids need. Make the patterns easy or complicated. You could have monthly theme patterns like I have shown. You could do a color pattern (just draw colored dots), community signs, school supplies, core words, spelling words....honestly it's endless!!


Special Days- color in the box, outline the box, write inside the box, use the notes section and color code it. I am really excited about this because my students are assigned to a general education class as well as my class. There are so many different activities going on, it gets overwhelming having to make cute pieces to go along with everything. I know, I know I could just throw something up on my cute calendar but....my students I won't have it. I can't deal with things not all matching. I think I am going to utilize the system I have below. I will write in the box when it has something to do with my class and then color code the boxes when it has to do with a gen. ed class. For example...students in "Mrs. Smith's" class will know their color is blue. So when something is outlined in blue they will know it is their day. Then I will write what the activity is in the notes section.


Weekends- Color weekends/no school days red. This was students can visually see when they don't have school. My students really struggle with the concept of school/no school days. This will be an added visual support for them.


Review Months- since the month before and after are listed on the calendar its a good way to practice/review.


Something else that is cool is when the month is over you can rip it off and hang it up like an anchor chart or take a picture, print it and store in a binder or have for student scrapbooks. That way you and your students can look back and see all of the things they did throughout the year.


Is this something you will be adding to your classroom? Do you have another use for this functional calendar routine?

To save this post for later pin the image below.
post signature Follow my blog with Bloglovin

Friday, August 5, 2016

Save Money by Double Siding Laminate Sheets!!

If you are anything like me you spend over half of your budget on Velcro and laminate. I had to find a way to save both and then it hit me. Why don't I just laminate 2 sheets back to back?


There are so many things that I laminate that don't require cutting. These would be the resources I would double side laminate. Here is how you do it.

1. Print everything you are wanting to laminate.


2. Find the items that go together and do not need to be cut.


3. Put them in the order you want.
4. Flip every other page so that the pages are back to back.
5. Slip 2 pages into a laminating pouch.

  -If you are really anal like me double check to make sure they are straight)

6. Put through the laminator.


7. Enjoy!!!

I usually hole punch and store in a binder or don't hole punch and store in a file folder. You can also add velcro to the pages. Just store the pieces in a Ziploc baggie and attach it to the page.

Now.....do any of you know of a way to save Velcro? That is my next mission :)

post signature Follow my blog with Bloglovin